ComputeMode™ 1.2 Quickstart
This Quickstart will assist you step after step in configuring your first nodes to get ready for a POV-Ray clusterized rendering process.
-
Stage 1: Getting ready for computation.
-
You now have several nodes up and running in ComputeMode virtual cluster.
You can check that all nodes are registered and available in OAR (aka the Job Manager) going to the following URL: http://cmserver/cgi-bin/monika.cgi, where cmserver corresponds to the IP address you gave to the ComputeMode server or for localhost if the browser runs on the server.
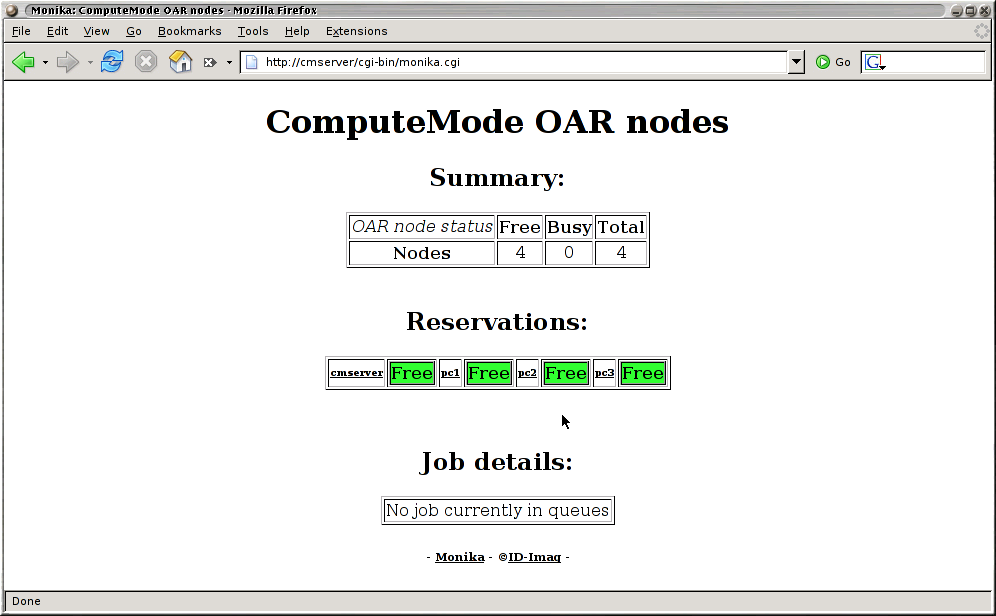
As you can see, in the present OAR configuration, the ComputeMode server (aka "cmserver") computes jobs also. That is not mandatory.
The URL: http://cmserver/cm/oar/ gives you a link to OAR Gantt diagram and to some documentations on OAR Job Manager.
-
Stage 2: Running your first clusterized jobs with the POV-Ray demo.
-
Go to ComputeMode POV-Ray demo web page at:
http://cmserver/pov, where cmserver stands for the IP address you gave to the ComputeMode server or for localhost if the browser runs on the server.

Choose a scene to render, "chess2.pov", for example.
The job submissions begin, and the page refleshes itself automatically.
PLEASE DO NOT PRESS THE BROWSER REFRESH BUTTON AS IT WILL ACTUALLY QUEUE ANOTHER JOB.
-
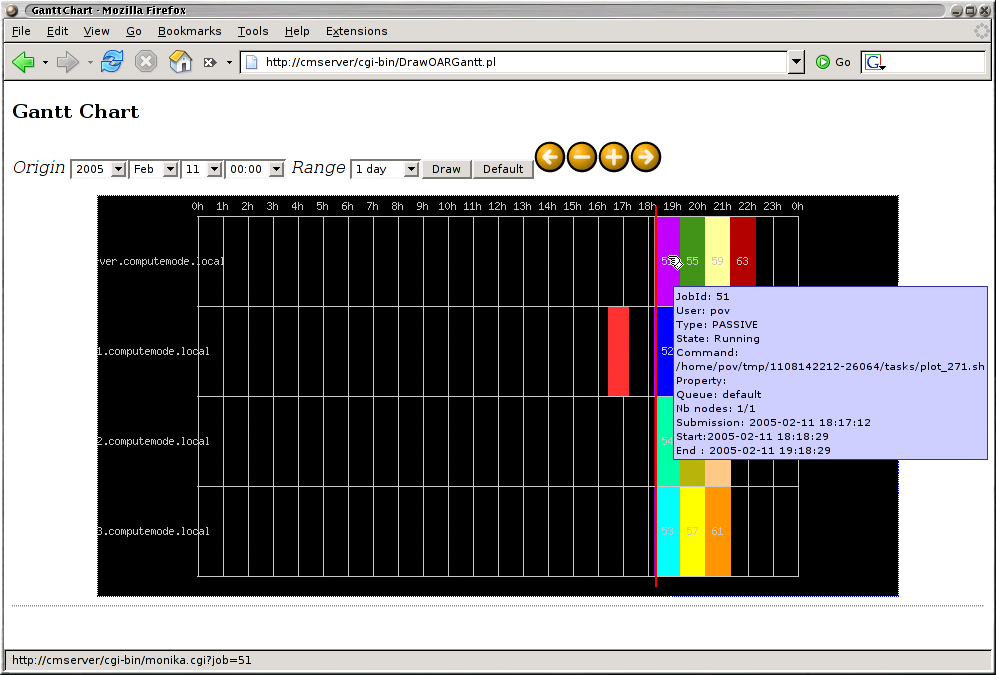
In the meantime, you can check on the OAR monitoring page that jobs are submited and affected to nodes.

-
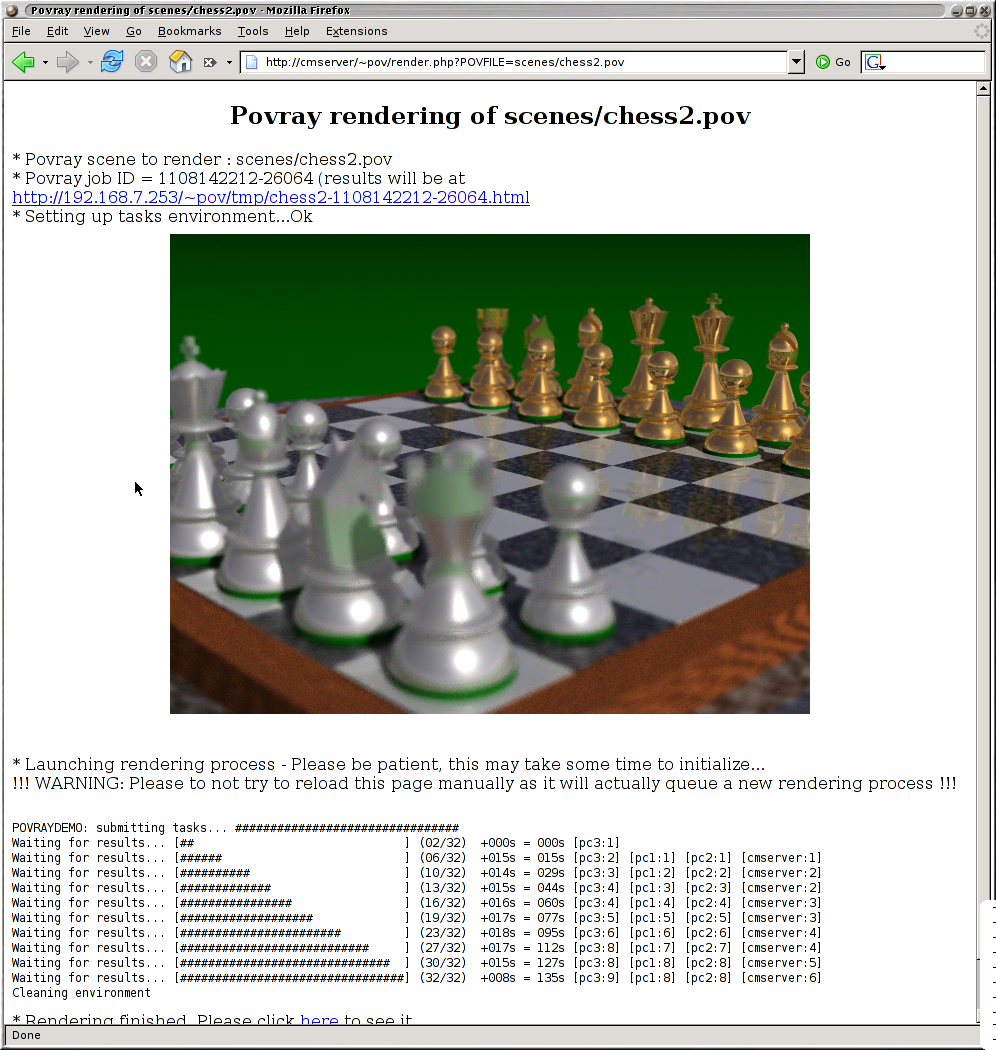
The POV-Ray rendering process goes on and the image is rendered row after row.
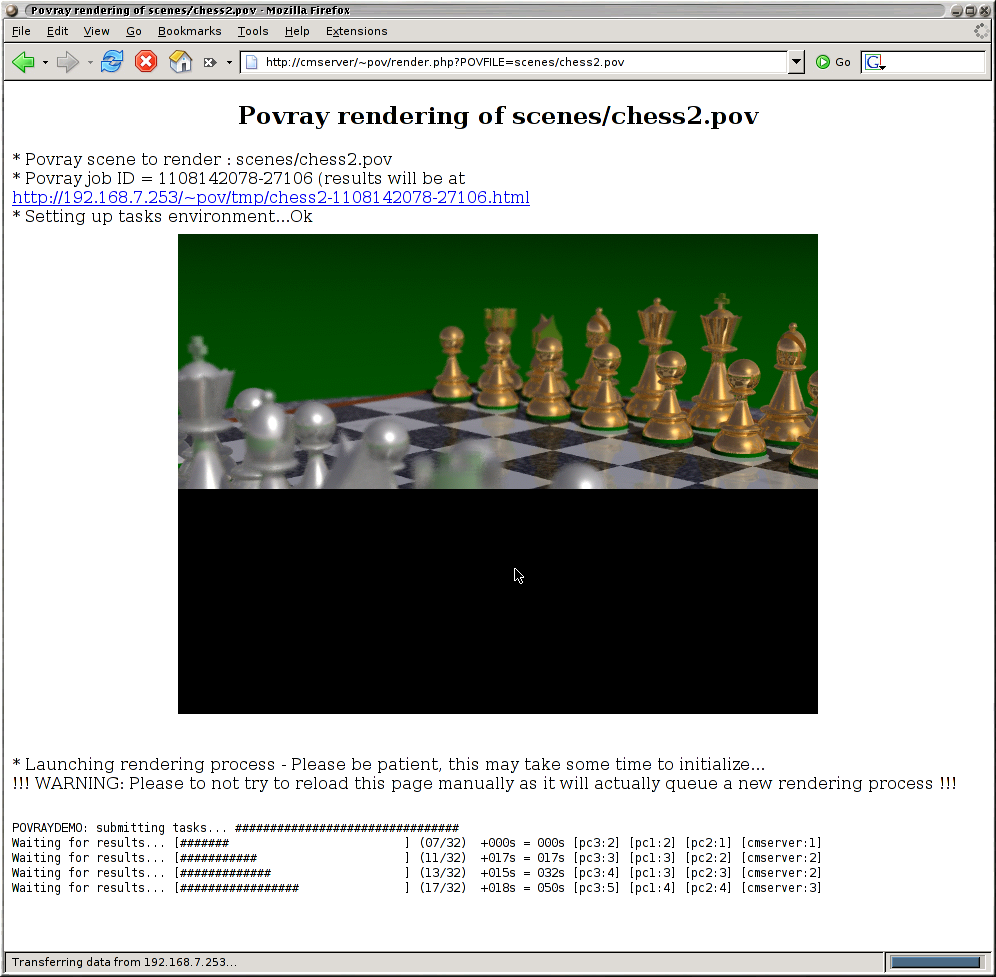
As you can see the image is actually stripped in many rows. For each row rendering, a job will be executed on one of the nodes of the ComputeMode virtual cluster.
-
OAR Gantt diagram shows you the jobs affectations.
-
The rendering finishes.
-
Stage 3: Tuning the nodes computation schedules.
-
You can now change the nodes computation schedule.
For instance, you can affect the predefined "Never" schedule.
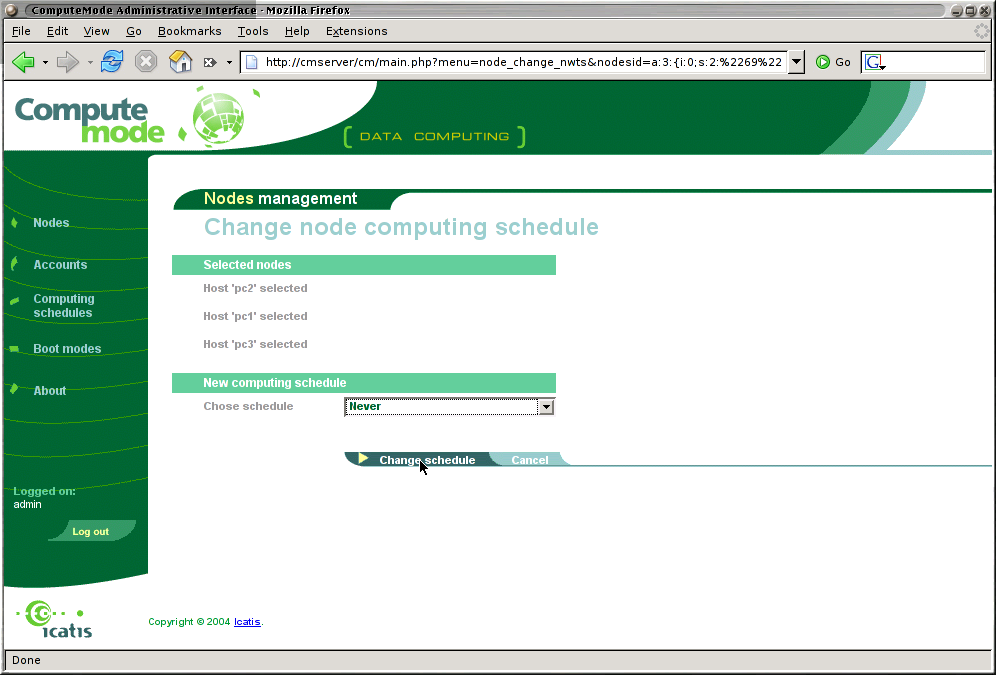
You will then notice that all nodes will automatically return to their original operating system.
-
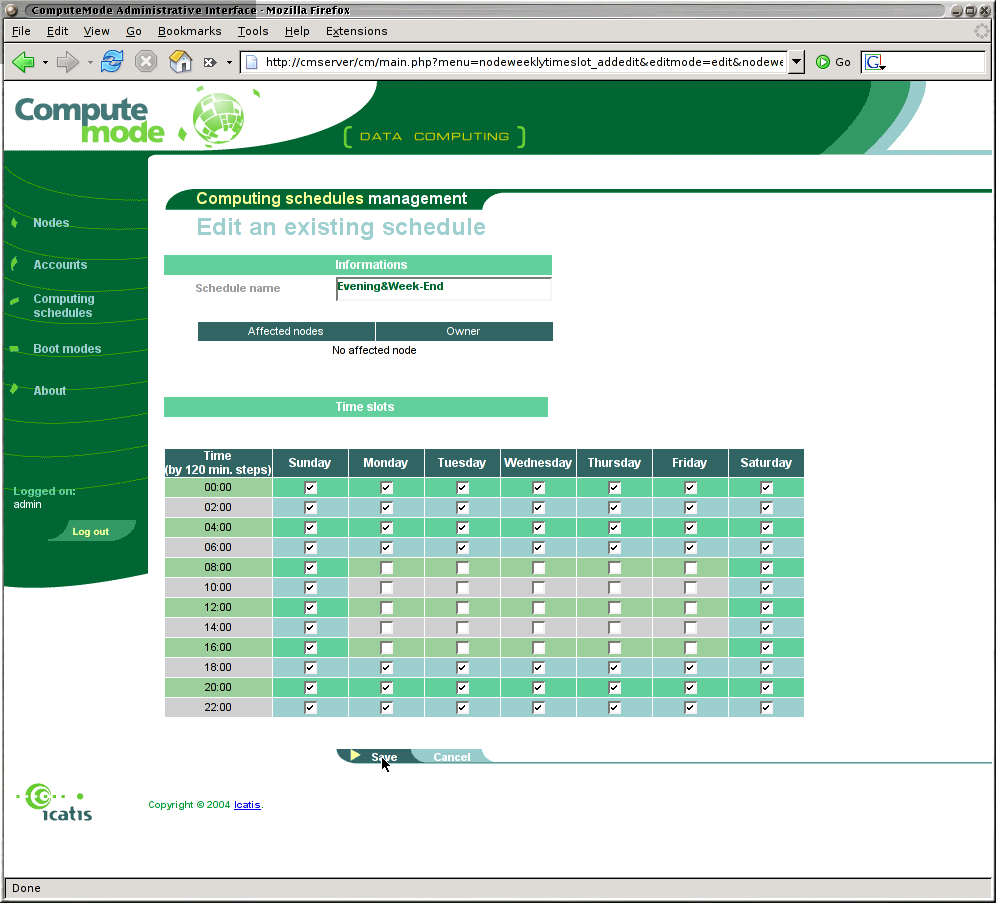
You can also define a custom schedule and affect it to nodes.
-
You are now free to go your way now ! ;-)
Check the manual and ask the user mailing list for more details.