ComputeMode™ 1.3 Server Setup
This manual will help you install and configure your ComputeMode™ server.
REQUIREMENTS:
- a spare PC with a harddrive you can erase (server) - at least Pentium 1GHz, 256MB RAM, Ethernet100, 4GB harddisk, a CD-Rom reader.
WARNING: the hard disk contents will be erased by ComputeMode installation.
- a spare PC supporting PXE boot (also called as network boot)
For testing purposes you may want to install it in a VMware virtual machine or try a free alternative (qemu, bochs, ...)
Stage 1: Installing the ComputeMode™ server
- Download the ComputeMode Server installation CD-Rom ISO from the download page.
- Burn it on a CD-R(W).
- Boot the PC you want to be the ComputeMode server with this CD-Rom. You will be shown with the screen below:

Press Enter.
Note: If you have specific hardware (CCISS) RAID
adapter, you will have further operations to do.
- The system should now load and take you to the ComputeMode installation banner.

Read the licensing text, if you agree with it choose "YES" to continue.
- Choose your keyboard flavor with the arrows.
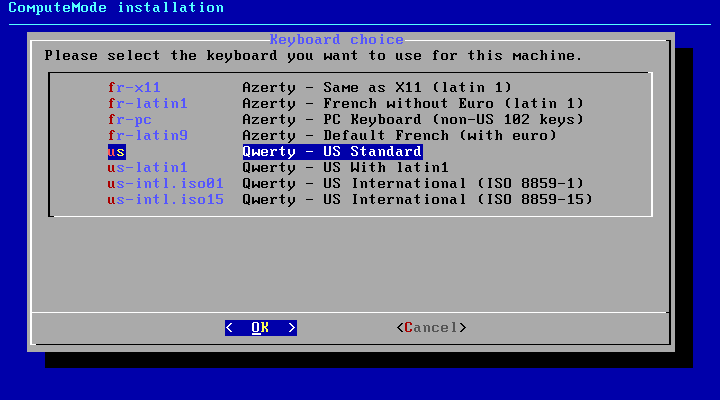
Press "OK" when done.
Note: Currently, only French and US keyboards are
supported at this stage. You will be able to change the default keyboard once
the server installation is done.
- Choose the hard disk on which you want to install ComputeMode.
WARNING: the hard disk contents will be erased.
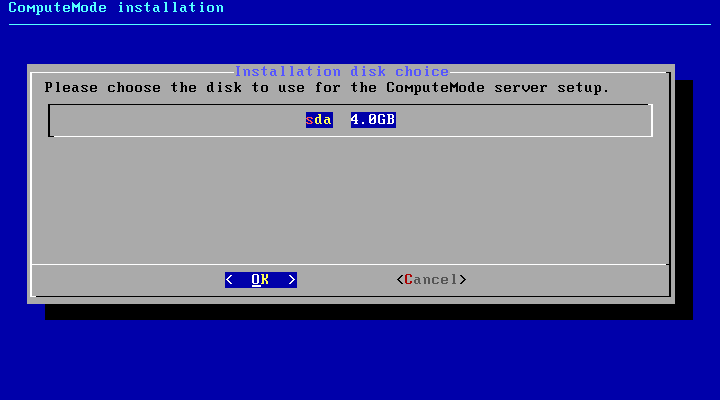
Press "OK" when done.
- The system installation starts and shows several non-interactive screens as it progresses.

This part of the installation lasts several minutes and will not require your attention. Enjoy a break!
- Then, you reach the networking setup dialog.
It allows you to specify how you will access your ComputeMode server from your intranet.
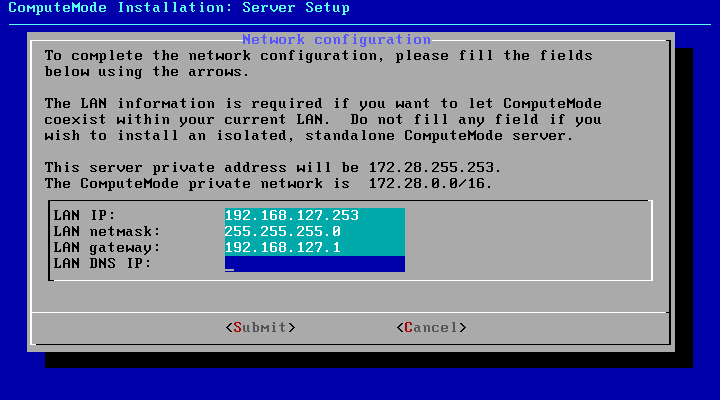
Use the arrows to browse the different fields.
If you specify an IP/netmask which is valid in your LAN, it will
allow you to access the ComputeMode server from your workstation.
If you specify a gateway, it will allow the ComputeMode
server to access machine outside your LAN and maybe even the Internet if your
intranet configuration allows it. This may be useful for to fetch updates or new packages for
instance.
If you specify a DNS, it will allow the ComputeMore server
to be aware of the naming of the other machines of your intranet, which may be
convenient, too.
Once your choice is done, press "OK".
Then you are shown with a summary of your configuration.
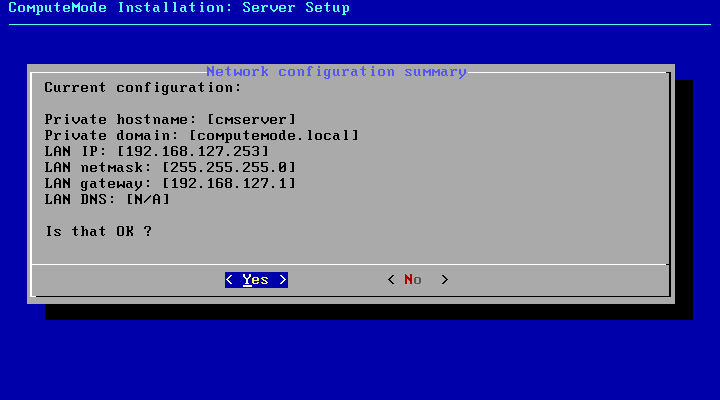
You have to press "OK" to resume the installation or "No" to edit again the networking parameters.
- Several non-interactive screens will follow till you are eventually shown with the final screen.

Press "OK", your server will now reboot.
- The ComputeMode server is now about to start. You are shown with a GRUB bootmenu such as the one below:
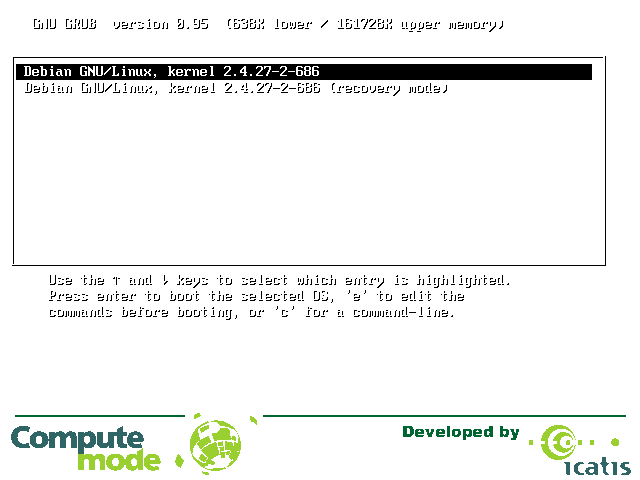
Press Enter to select the default menu item, or wait a few seconds.
- The Linux system will now boot and take you to a login prompt.

You may log in as root (password = icatis) and
as guest (password = guest).
Note 1:If that does not work, make sure your keyboard settings are OK (for instance try 'icqtis')
Note 2:It is not currently mandatory but YOU ARE STRONGLY ADVISED to
change the default Unix passwords using the 'passwd' utility.
Stage 2: Accessing the ComputeMode™ server administration interface
- If you chose to let your ComputeMode server be accessed
from within your LAN, enter the IP address you gave to the ComputeMode server
in a web browser on your workstation.
If you encounter troubles here, check that the IP address
you gave to the ComputeMode server in the previous stage is valid and that you
can ping it from your workstation.
If you did not give any IP/netmask to the server (if it is
located on an isolated network for instance) you will have to use a local X
server on the ComputeMode server. The X server shipped should already be
configured to run on most modern PCs (thanks to the X vesa driver). just try to log in
at the console prompt with login = guest / password =
guest, then type 'go'.
Note: It is not currently mandatory but you ARE
STRONGLY ADVISED TO CHANGE this password NOW !
If the vesa X server does not work, you have to reconfigure
it by using the command: 'dpkg-reconfigure xserver-xfree86' and
choose a better driver.
Once the X server is up and running, it should
automatically run Mozilla Firefox showing the ComputeMode web administation
interface at the following URL: http://localhost/.
When you have a working browser, you are shown with the
login page of ComputeMode web administration interface, such as in the
screenshot below:

- Log in with the username '
admin' and the
password 'icatis'. If you succeeded in logging in, you are shown
with a screenshot such as below:
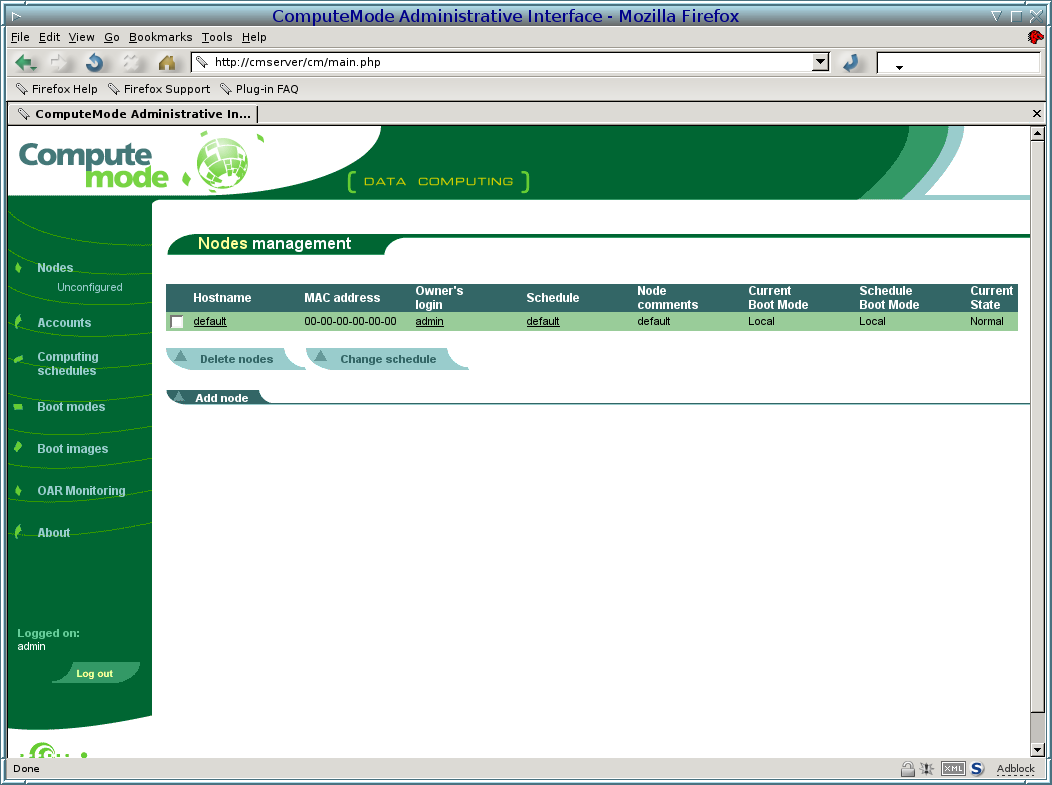
- We are now going to change the default password.
Note:It is not currently mandatory but you ARE
STRONGLY ADVISED TO CHANGE this password NOW !
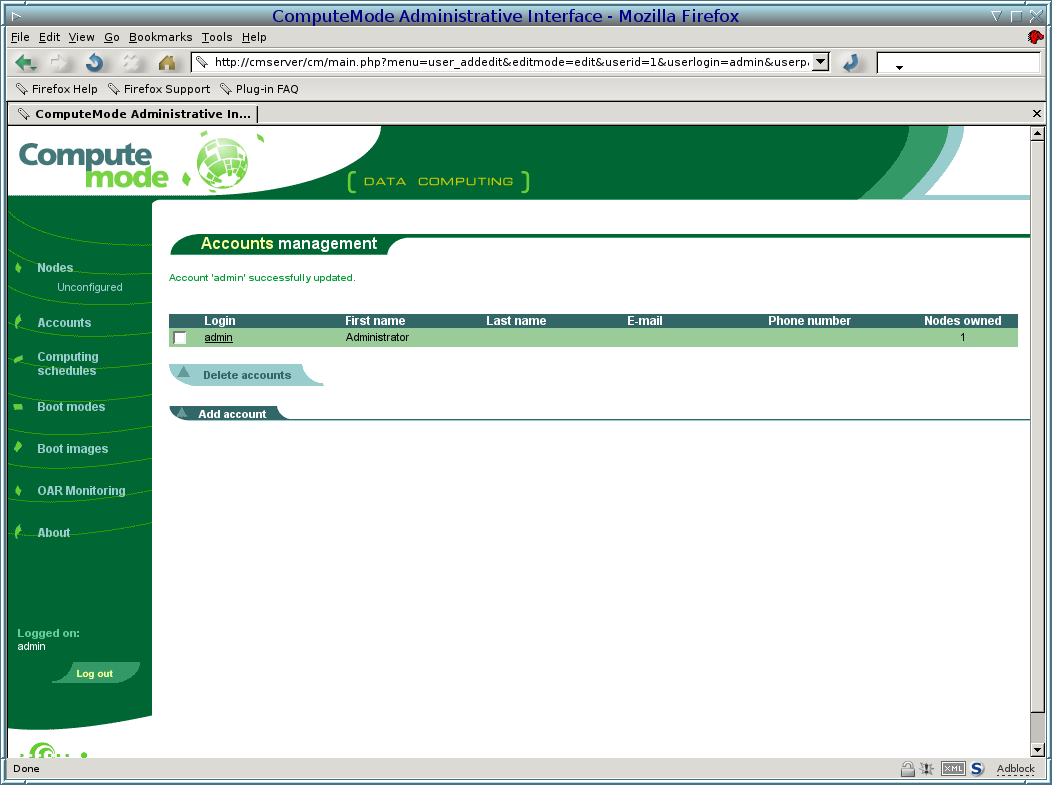
- Click on the left menu 'Accounts'. You will have the accounts page:
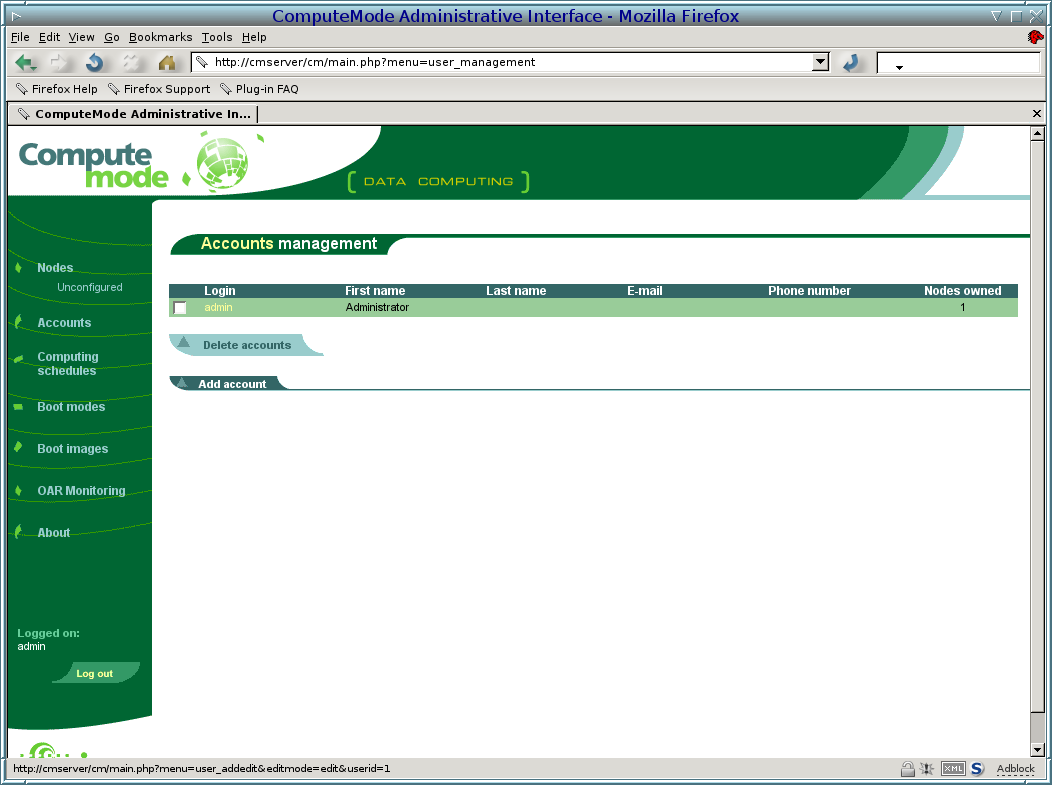
- Click on the 'admin' login. You will be taken to the account editing page:
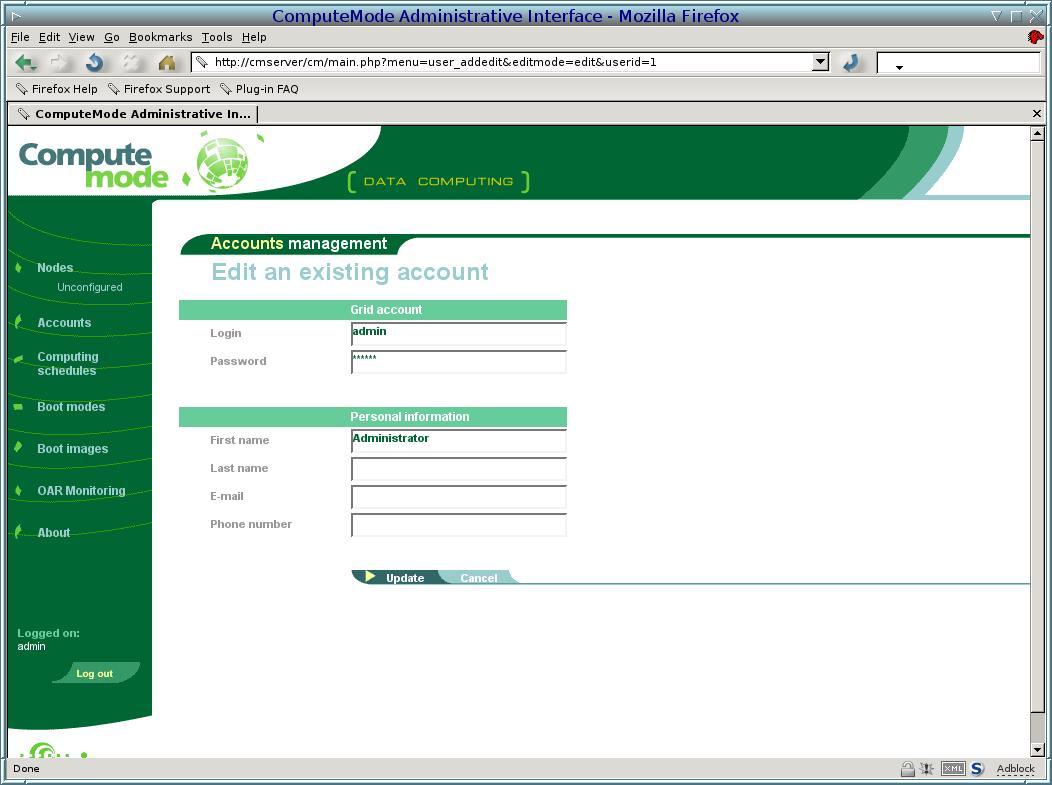
Enter a new password - it will be hidden with stars.
- Click on the 'Update' at the bottom of the page. You will be taken back at the accounts page with the status report of your operation displayed at the top of the page, such as in the screenshot below:
Stage 3: Adding your first nodes to the infrastructure
- On the Web interface, click on the 'Unconfigured' submenu, below Nodes. You should have a screen as the one below:

- Boot another machine connected to the same LAN as the ComputeMode server.
If not already done, go into its BIOS to enable network boot. Depending
on your BIOS, this may be more or less challenging.
You may also try a one-shot PXE boot by pressing F12 at boot time
(the key used may depend on your hardware or BIOS)
- Your system will now try to network boot with PXE. You will get a screen such as the one below:
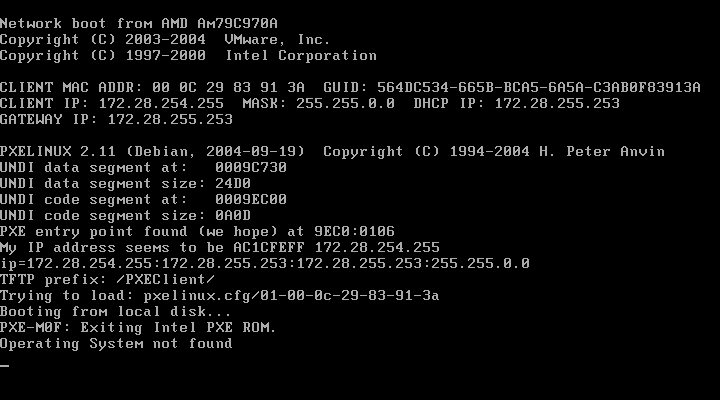
As the machine is not configured yet to enter the ComputeMode virtual cluster,
it will boot the local operating system, no change being noticable.
- Now reload the 'Unconfigured' pages of the ComputeMode web administration interface. You should have a new entry such as in the screenshot below:

An Unconfigured machine is shown appeared. You can check that the ethernet address is the one of the PC you just booted.
- Click on the machine hostname (the one in
u_...) to edit its properties. You will be taken to the node edition page:

- Edit the field as you wish (for instance: hostname='cmclient24' Note='My very
own node' Wake-on-LAN='Yes' and choose 'Always ComputeMode' as a Computing Schedule).
Note: do not change the MAC address...
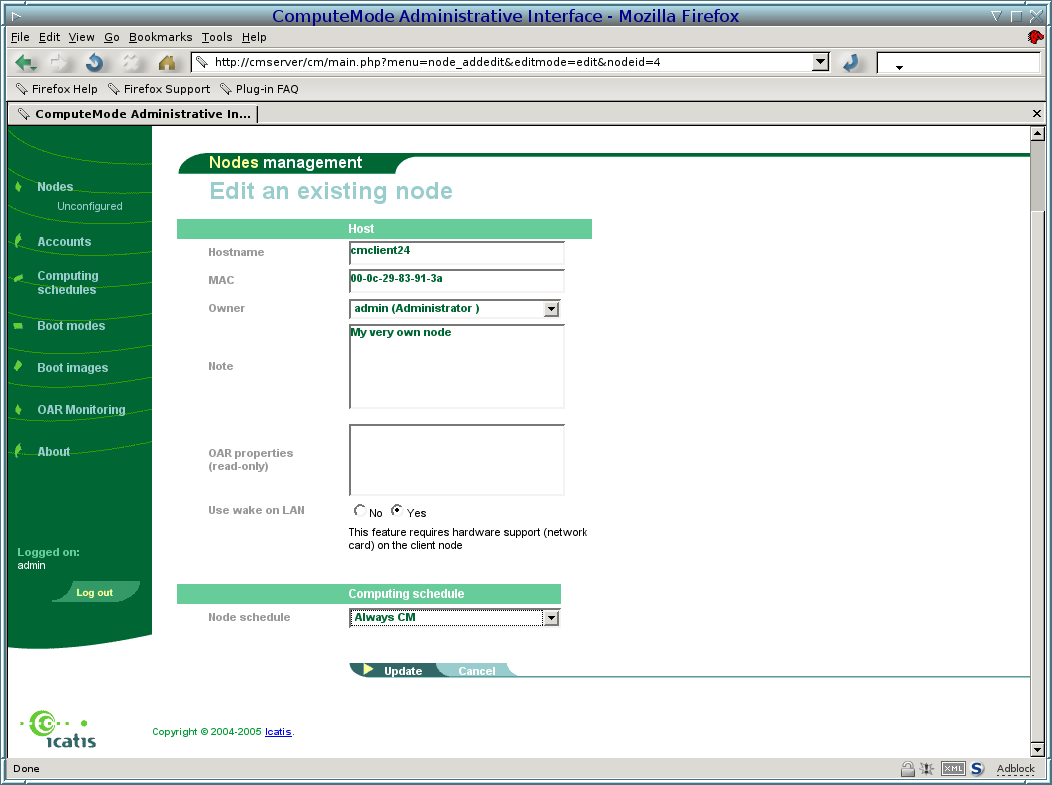
- Once you are done, click the 'Update' button, you
will be taken back to the 'Nodes management' page for 'Unconfigured' nodes.
You may notice the status message and the node you edited has disappeared !
Don't panic as it is now configured.
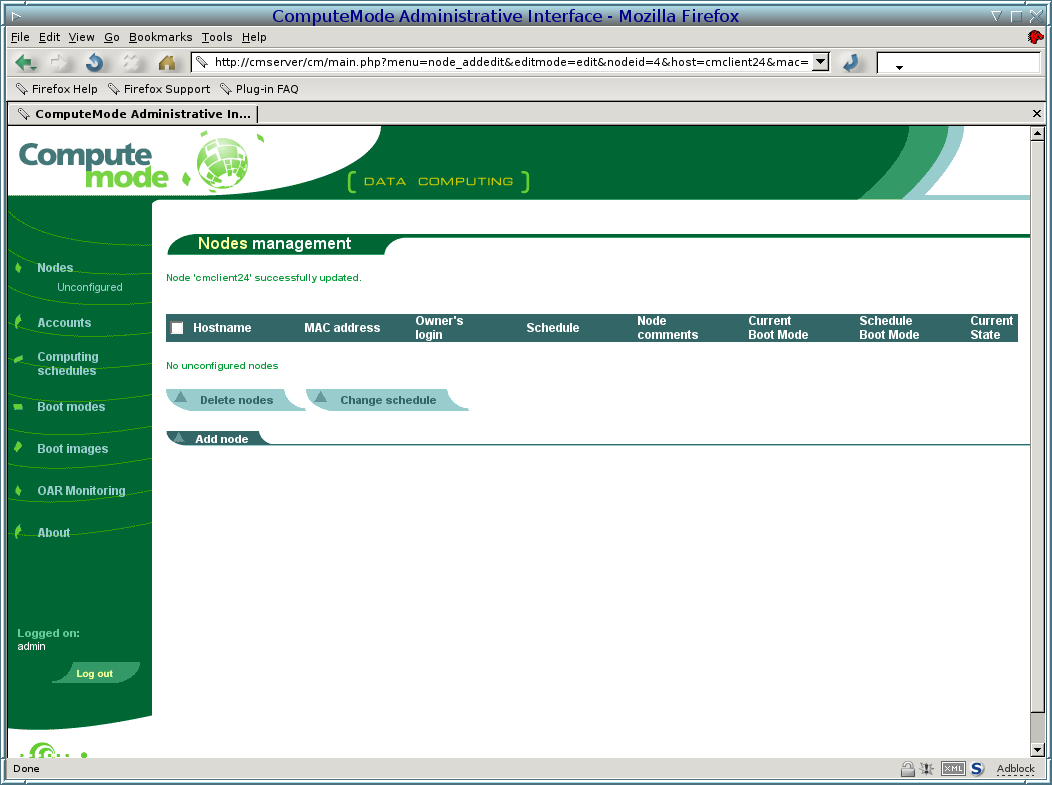
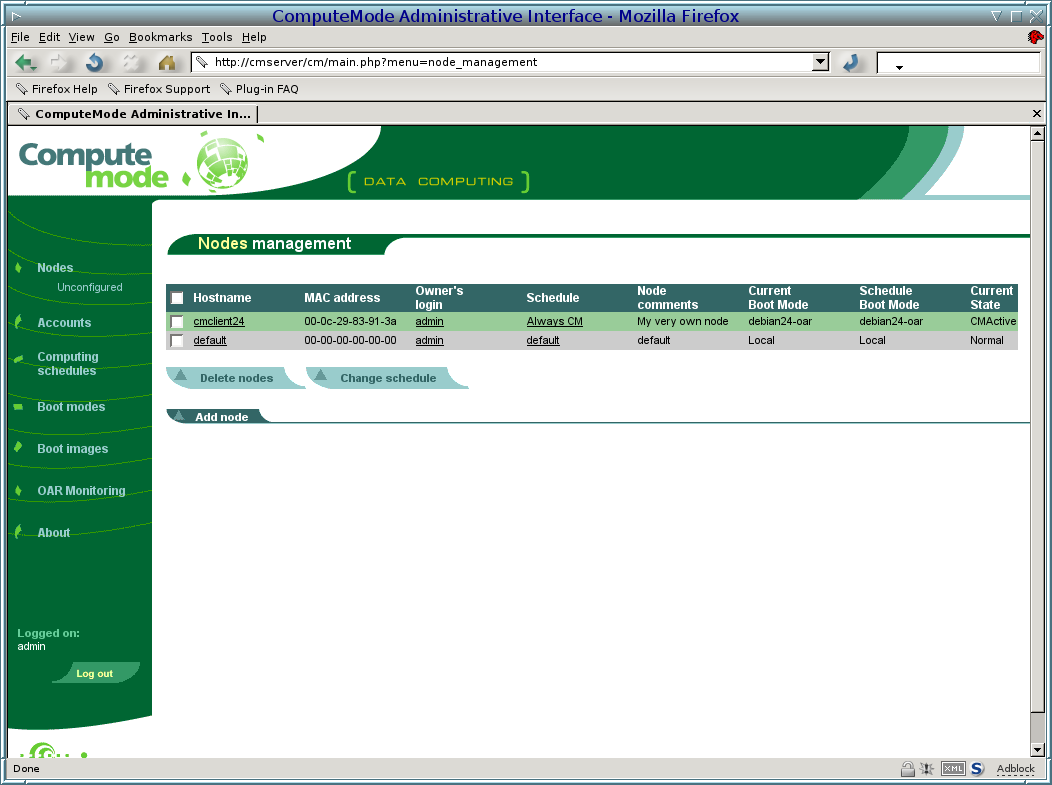
- Click on the 'Nodes' menu, you will now see your configured node.

Note 1: 'Current bootmode', 'Schedule bootmode' and 'Current state' are automatically
set by ComputeMode and cannot be edited.
Note 2: 'Current bootmode' indicates the
bootmode in which ComputeMode thinks your host is running, 'Schedule bootmode'
indicates in which bootmode your client should be according to the schedule
(for instance if you reboot it now), and 'Current state' indicates in which
state the automaton is (Normal, CMActive, or booting)
Note 3: In previous ComputeMode versions,
only the 'Schedule bootmode' was used to indicate whether the client was
available for CM or not
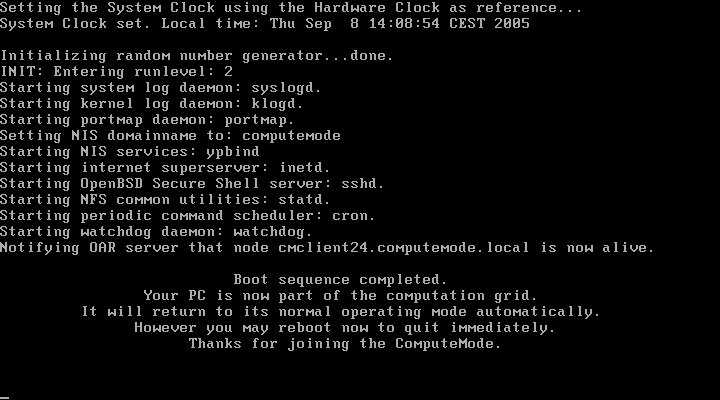
- Reboot your node, and it will now boot in ComputeMode.
During the boot, you should see a screen such as:

Then, when the boot is finished, you will see a screen such as:
Note: Unlike previous ComputeMode versions (up to and including 1.2), node will not be inhibited if you hit the "ctrl-alt-del" sequence. This feature has been disabled for lack of reliability but will probably be added again in a future version.
- If you go back to 'Nodes' menu and reload the page,
you will notice the informative states of your node have been updated.
- You can now do these same steps for the other machines you want in your cluster.