ComputeMode server appliance
Contents |
Retrieving virtual appliances
- To retrieve the appliance for the Virtualbox system:
wget http://computemode.imag.fr/files/appliances/ComputeMode_Appliance_2.0_vbox_64bits.zip
or:
wget http://computemode.imag.fr/files/appliances/ComputeMode_Appliance_2.0_vbox_32bits.zip
for VMware:
wget http://computemode.imag.fr/files/appliances/ComputeMode_Appliance_2.0_vmware_64bits.zip
or:
wget http://computemode.imag.fr/files/appliances/ComputeMode_Appliance_2.0_vmware_32bits.zip
for KVM:
wget http://computemode.imag.fr/files/appliances/ComputeMode_Appliance_2.0_kvm_64bits.zip
or:
wget http://computemode.imag.fr/files/appliances/ComputeMode_Appliance_2.0_kvm_32bits.zip
- Then, unzip the appliance:
For Virtualbox:
unzip ComputeMode_Appliance_2.0_vbox_64bits.zip
or:
unzip ComputeMode_Appliance_2.0_vbox_32bits.zip
For VMware:
unzip ComputeMode_Appliance_2.0_vmware_64bits.zip
or:
unzip ComputeMode_Appliance_2.0_vmware_32bits.zip
For KVM:
unzip ComputeMode_Appliance_2.0_kvm_64bits.zip
or:
unzip ComputeMode_Appliance_2.0_kvm_32bits.zip
Configuration of your new CMserver appliance for VirtualBox
Installation of the CMserver appliance for VirtualBox
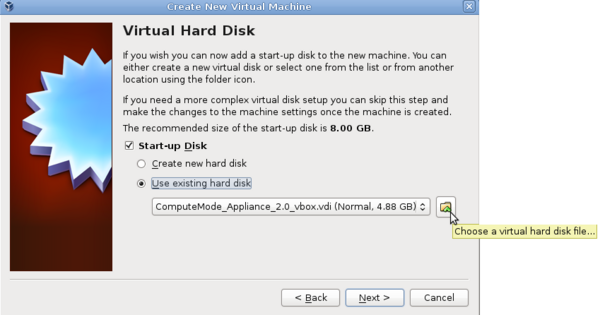
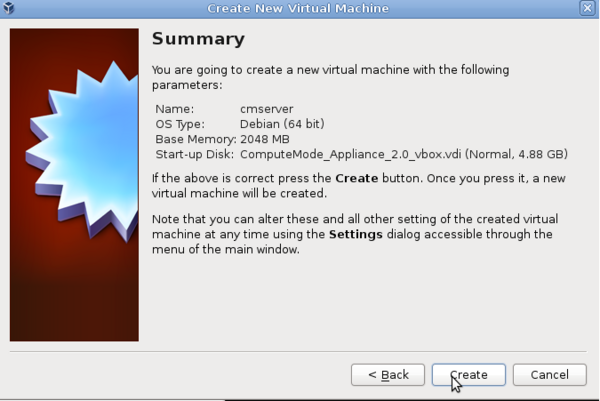
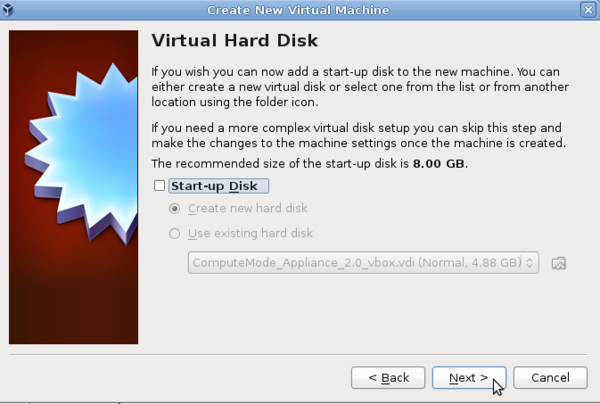
- Create and configure a new virtual machine with virtualbox:


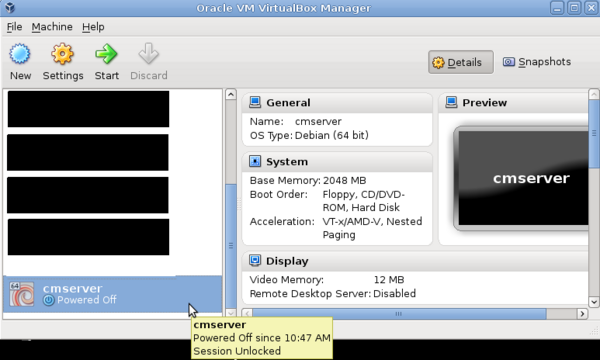
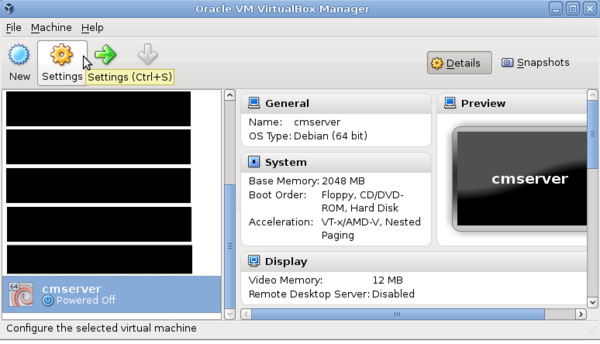
- A new appliance is now available, you now have to configure the network:
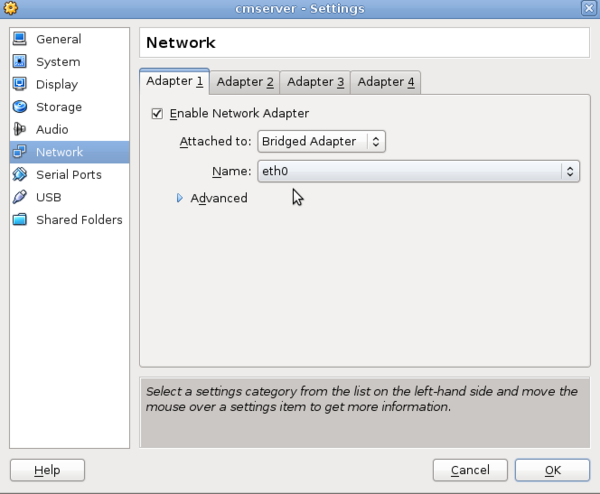
You may define two interfaces: the first interface bridged with your local interface eth0 for example, to access to your server through a ssh connection:
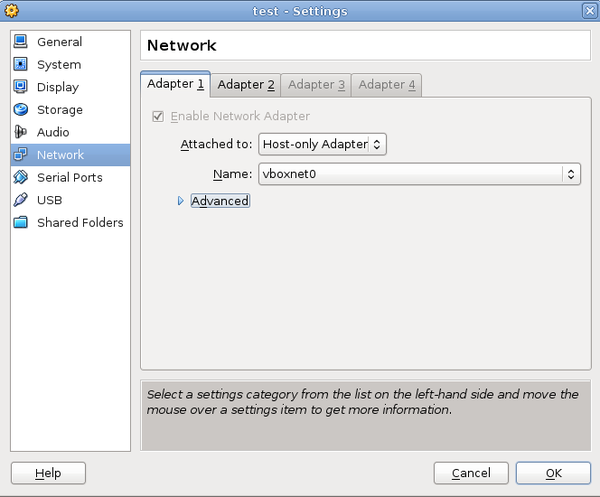
or if you are only using virtual appliance and you don't want your virtual network to interact with your local one, you can define a host-only interface:
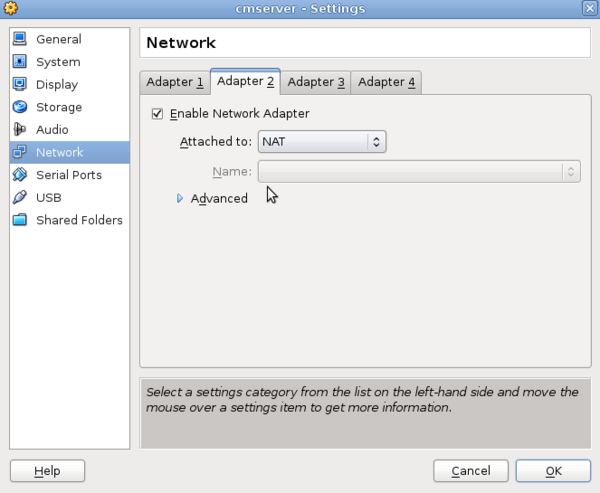
The second, with a NAT configuration, to allow the cmserver to access to the outside (to upgrade packages for example):
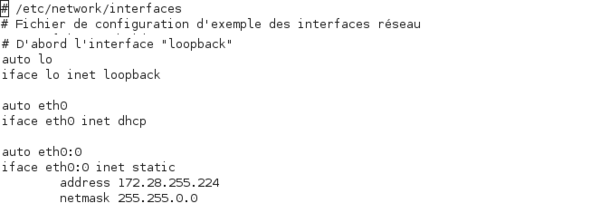
Finally you have to configure your local network. The eth0 interface have to access to the CMserver network, this is an example of how to configure the /etc/nerwork/interfaces file. This is just needed for a bridged interface, you don't have to edit anything for a host-only interface:
Finishing the installation: configuration of the cmserver for VirtualBox
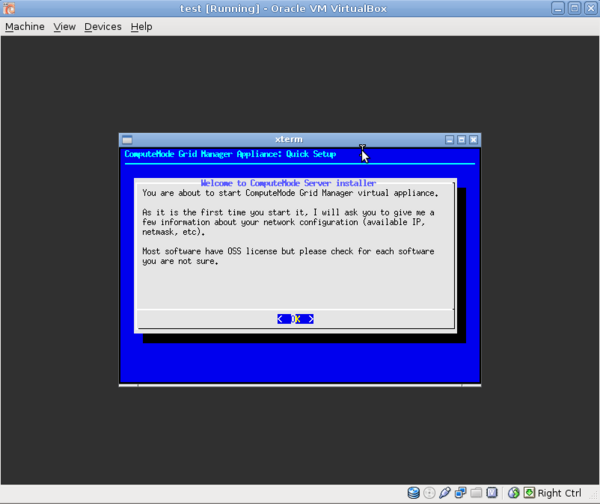
- You just have to start your appliance and log-in with the following credentials (be carrefull with the US default keyboard map)
login: root
password: icatis
- Once logged, a script is executed the first time the appliance is booted to configure environment. This script named cmaskconfig is used to configure both environment of nodes in the /cm directory and the cmserver. So you will ask to answer several time to configure a timezone, keyboard mapping, locales [...]: once for images in /cm directory and once for your local virtual machine.
- To finish the installation, just edit the /etc/nerwork/interfaces file from the cmserver and configure your two new interfaces like following:
# The bridged/host-only interface:
auto eth0
iface eth0 inet static
       address 172.28.255.253
       netmask 255.255.0.0
# The NATed interface:
auto eth1
iface eth1 inet dhcp
- Just reboot the cmserver to complete your installation
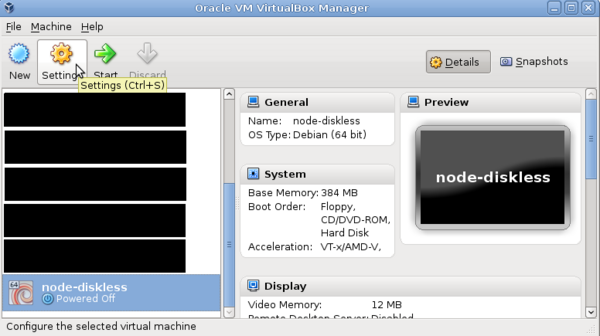
How to create nodes on VirtualBox to test the appliance
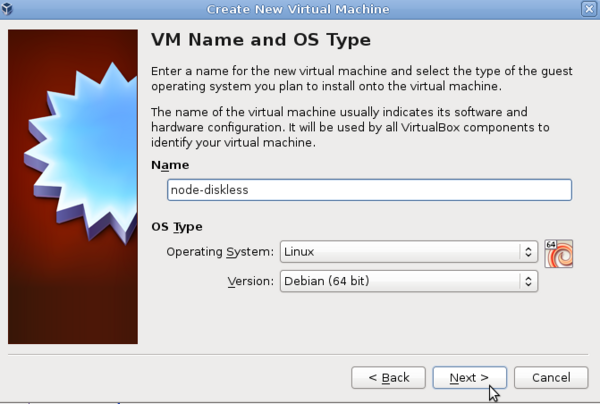
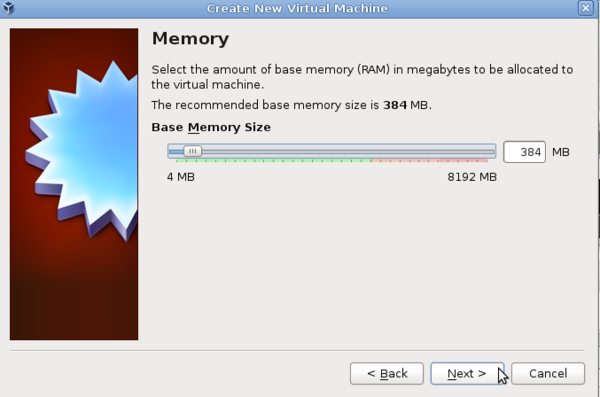
- You can quickly create a diskless node for the computemode cluster:
- and then configure the network of this node:
If your server is configured with a bridged interface, you have to configure a bridged one for the node:

You you are using a host-only interface for your server, you need to use the some configuration for your node:
And to finish configure the boot order of your node to set the network boot in first:

Configuration of your new CMserver appliance for KVM
Installation of the CMserver appliance for KVM
You can use the basics KVM/QEMU softwares to configure your cmserver appliance:
- Installation of the KVM/QEMU software under a Debian Squeeze:
sudo apt-get install qemu-kvm libvirt-bin
- Configuration of your user permissions:
adduser <youruser> kvm
- Run the following kvm command:
kvm -m 1024 --boot c -vga std -net nic /PATH/TO/THE/FILE/ComputeMode_Appliance_2.0_kvm.qcow2
Some explanations:
-m the memory size used for the virtual appliaces, here 1GB
--boot the boot order ot the virtual appliance, here the local hard disk
-vga  the configuration of your graphical driver
-net the definition of your network card
You can also configure a bridged network connection to access through SSH to your new server:
- Install missing packages:
apt-get install bridge-utils uml-utilities
- Edit your /etc/network/interfaces file:
auto lo
iface lo inet loopback
auto br0
iface br0 inet static
      address 172.28.255.224
      netmask 255.255.0.0
      broadcast 172.28.255.255
      bridge_stp off
      bridge_maxwait 5
      bridge_fd 0
      pre-up /usr/sbin/tunctl -u <username> -t tap0
      pre-up ifconfig tap0 up
      bridge_ports eth0 tap0
      post-down ifconfig tap0 down
      post-down tunctl -d tap0
- Restart your network:
sudo /etc/init.d/networking restart
- Launch the appliance:
kvm -m 1024 --boot c -vga std -net nic -net tap,ifname=tap0,script=no,downscript=no /PATH/TO/THE/FILE/ComputeMode_Appliance_2.0_kvm.qcow2
- You can customize your /etc/qemu-ifup script and /etc/qemu-ifdown script to manage users and tap devices and execute the previous command without the 'script=no,downscript=no' options.
How to test the computemode server
If you want to run some tests on your computemode server, you can follow this link: http://computemode.imag.fr/mediawiki/index.php/HowTo_test_cmserver